
The installation of a front door relies on preparation work that determines the sealing, security, and longevity of the installation. A poorly aligned frame, a neglected threshold, or incomplete weatherstripping can compromise the entire setup, even with a high-end door unit. Before touching the first tool, several technical checks should be methodically addressed.
Administrative steps before changing a front door
Most guides focus on tools and installation steps. They overlook a prerequisite that can block a project: the prior declaration at the town hall. In a single-family home, replacing a door with an identical model usually does not trigger any formalities. However, changing the color, dimensions, or type of glazing visible from the street may require a declaration, especially in protected areas (surrounding a historical monument, remarkable heritage site).
In a co-ownership, the constraint is different: the agreement of the property manager, or even a vote in the general assembly, may be required before any modification to the facade. Checking this point before ordering the door avoids a late refusal or the obligation to restore the original state.
To prepare for the installation of a front door correctly, this administrative step is an integral part of the process, just like taking measurements.
Threshold and framing: critical points to check
The threshold concentrates the majority of defects observed after the installation of a front door. An absent or too low drip edge allows water to flow inside. An insufficient slope on the outside creates stagnation that eventually degrades the frame and the floor covering. The threshold must be level, clean, and connected to the finished level of the outside ground before any installation of the frame.
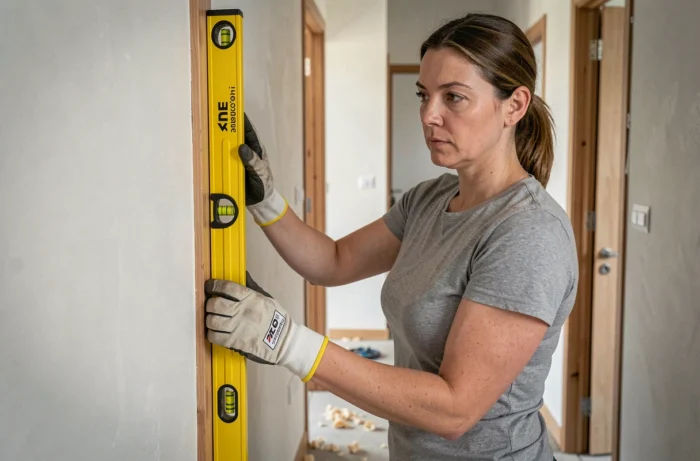
Preparing the support also includes checking the level and plumb of the existing frame. A gap of a few millimeters can be corrected with shims, but a severely deformed frame requires masonry work. Using a spirit level (or a laser level for more precision) on all four sides of the opening allows for the detection of these defects before they become problematic.
Floor insulation and thermal continuity
The connection between the threshold and the floor insulation is often overlooked. If the house benefits from external thermal insulation (ITE), the frame must align with the insulation plane to avoid a thermal bridge at the foot of the door. This junction area deserves specific treatment from the preparation phase, as it becomes inaccessible once the door unit is fixed.
Complete removal or installation on existing frame in renovation
In renovation, the choice between these two methods radically changes the level of difficulty and the final result. The complete removal involves taking out the old frame down to the raw masonry. It allows for addressing thermal bridges, restoring sealing, and installing a perfectly adjusted new frame. The project is longer and messier, but the result is comparable to a new installation.
The surface-mounted installation on the existing frame (sometimes called renovation installation) is faster. The new structure is fixed onto the old frame, which reduces finishing work. This method has a limitation: it slightly decreases the passage width and does not correct an old degraded or poorly insulated frame.
- Existing frame is sound and plumb: installation on the existing frame remains viable, provided there is no play and no rot (wood) or corrosion (steel).
- Deformed frame, signs of infiltration, or absent insulation: complete removal is the only reliable option to start with a sound base.
- Presence of recent ITE: complete removal facilitates the connection between the new frame and the insulation plane, limiting heat loss.
Sealing of the front door: beyond expanding foam

Many tutorials recommend filling the gap between the frame and the masonry with expanding polyurethane foam. This foam serves as thermal insulation, but it does not constitute a compliant sealing solution for an exterior door on its own. The NF DTU 36.5 distinguishes three functions that weatherstripping must fulfill separately.
- On the outside: a compressible band or joint filler combined with a sealant provides a barrier against water and wind.
- Between the frame and masonry: low-pressure PU foam fulfills the insulating function, without excess pressure that would deform the frame.
- On the inside: a seal or vapor barrier ensures the continuity of air sealing, preventing condensation within the wall thickness.
Neglecting any of these three planes creates a weak point. Air infiltration degrades the thermal performance of the door, regardless of its displayed insulation coefficient.
Cylinder and lock: anticipating the hardware
The choice of the cylinder and handle occurs before installation, not after. A multi-point security cylinder must be compatible with the ordered door unit. Checking the number of locking points (three or five points depending on the desired level of security), the direction of opening (left or right), and the length of the cylinder avoids back-and-forth with the supplier on the day of the project.
The direction of opening is determined by standing outside, facing the door: if the hinges are on the left, the door is referred to as “left-hand push.” This simple convention conditions the choice of the lock, handle, and threshold with a drip edge.
A well-prepared front door can be installed in a few hours. A poorly prepared door leads to corrections for months. The time invested in checking the threshold, choosing the removal method, and thoroughly treating the sealing determines the durability of the installation much more than the brand or price of the door unit itself.